Red Velvet Cake
For the full experience, make this recipe with the Kenwood Recipes app.

recipe by Kenwood https://kenwoodworld.com/
-

- Total Time
- 1hr 45mins
-

- Serves
- 12
-

- Calories
- 792


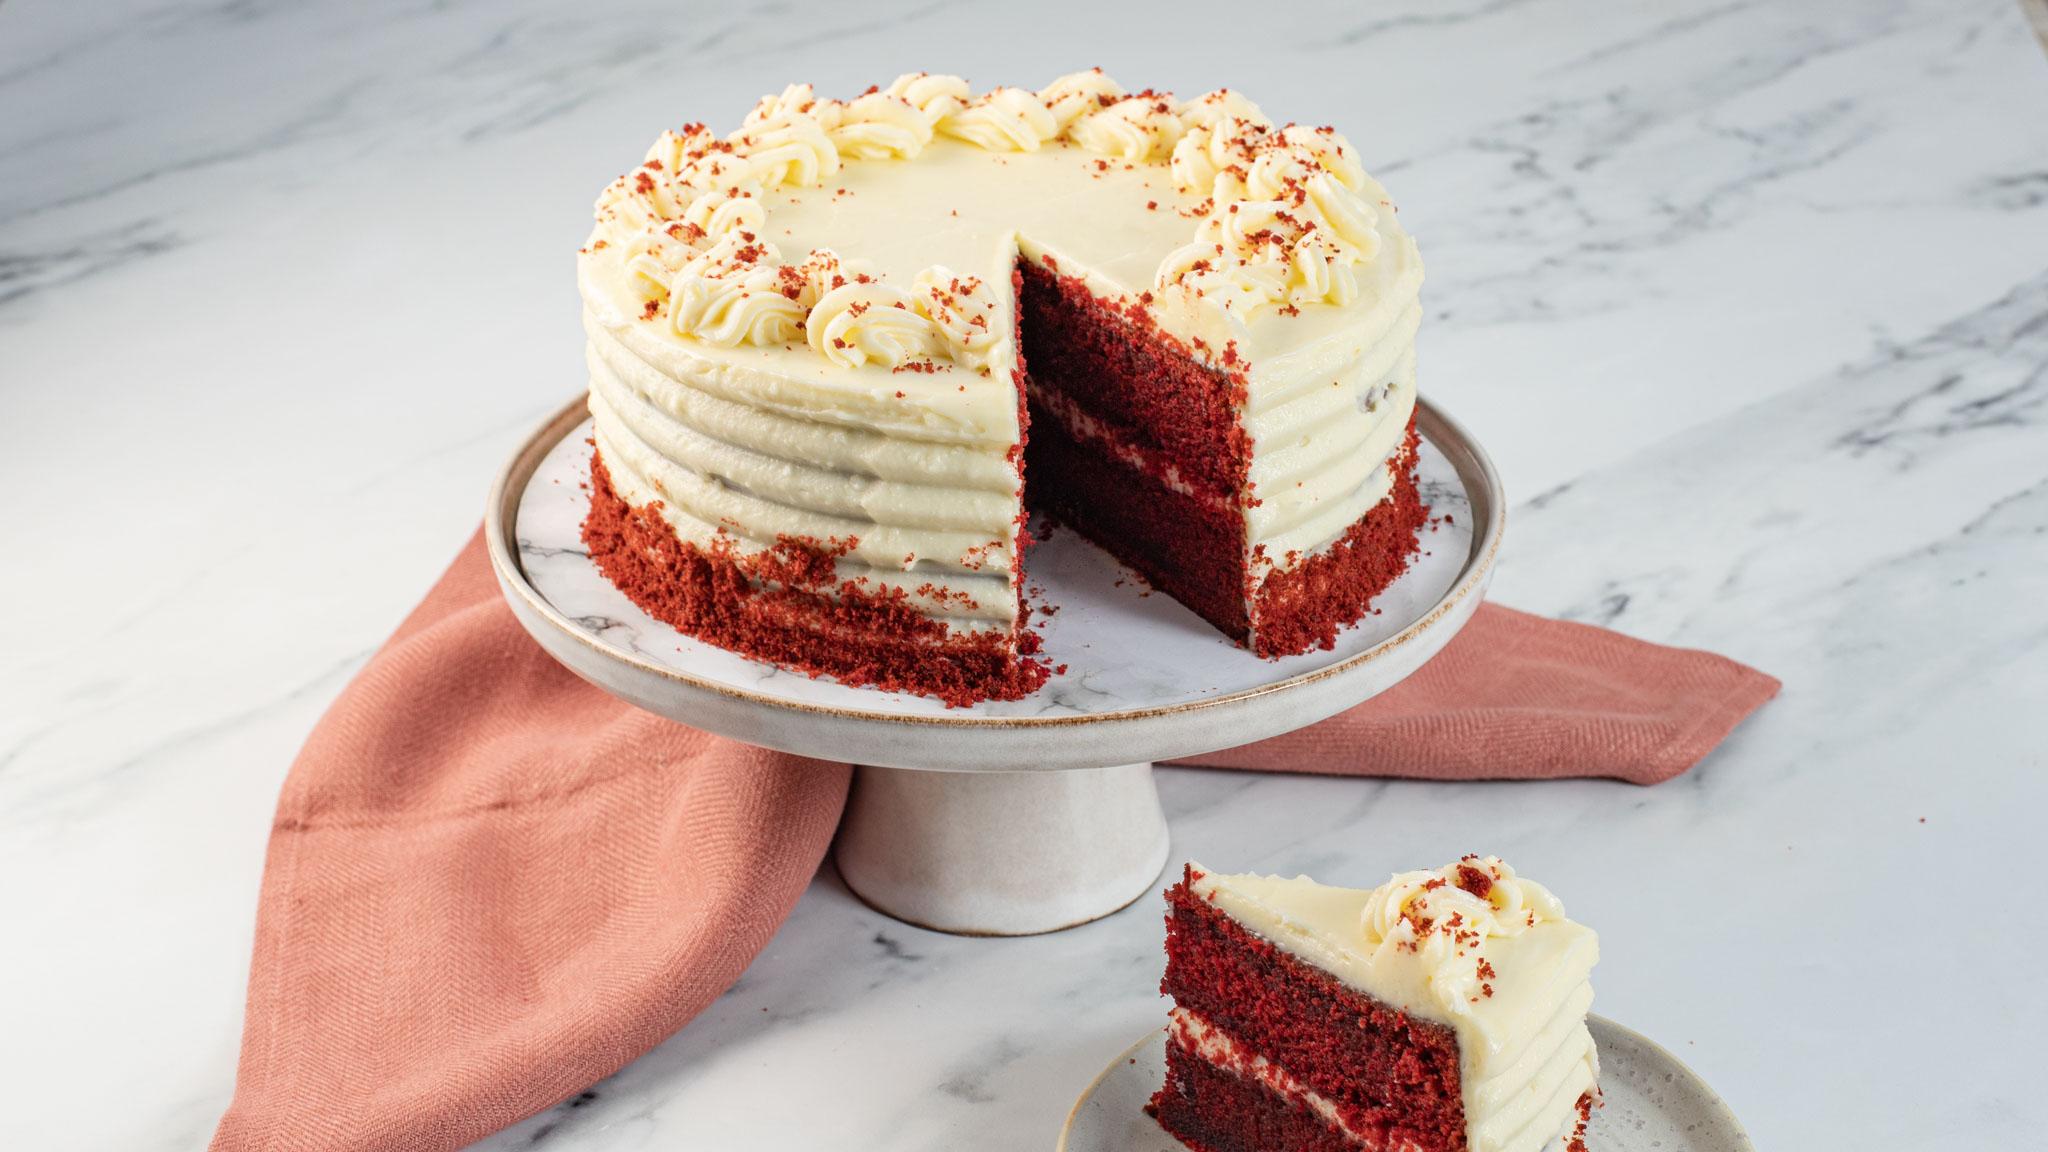
Indulge in the perfect centrepiece for any celebration with our two-tier Red Velvet Cake. This classic dessert combines layers of rich, velvety red cake with a sumptuous cream cheese frosting, creating a delightful blend of flavours and textures. Whether it's a birthday, anniversary, celebration, or any special occasion, this elegant two-tiered masterpiece is sure to impress and satisfy your guests' sweet cravings. Make your moments unforgettable with this decadent Red Velvet Cake that adds a touch of luxury to every celebration.
recipe updated Jan 26, 2026
Ingredients
-
- Unsalted butter
- 365 g
-
- All purpose flour
- 360 g
-
- Cocoa powder
- 2 tablespoons
-
- Salt
- ½ teaspoon
-
- Baking soda
- 1 teaspoon
-
- Caster sugar
- 400 g
-
- Vegetable oil
- 240 ml
-
- Egg yolk
- 4
-
- Vanilla extract
- 1 tablespoon
-
- White vinegar
- 1 teaspoon
-
- Buttermilk
- 240 ml
-
- Red food coloring
- 1 teaspoon
-
- Icing sugar
- 250 g
-
- Cream cheese
- 300 g
-
- Egg white
- 4


Tools
-
Oven
-
Kenwood Chef
-
Medium bowl
-
Large mixing bowl
-
Piping bag
-
Round pan - 20cm (8")
-
Cake board - 23cm (9")
Step preview
- Making the sponge cakes:
- Preheat the oven - 175ºC
- Grease the tins and line with parchment paper
- Sift the ingredients into a medium bowl and set aside
- Fit the Whisk Tool
- Add the ingredients into the appliance bowl
- Whisk - 3 minutes, speed Max
- Transfer the whisked egg whites into a large bowl and set aside
- Remove the Whisk Tool and fit the K-Beater
- Add the ingredients into the appliance bowl
- Mix – 1 minute, speed 3
- Add the next ingredients
- Mix – 2 minutes, speed 3
- Then add the next ingredient and half of the flour mixture
- Mix – 1 minute, speed 2
- Add the remaining buttermilk and the flour mixture
- Mix – 1 minute, speed 2
- Add the next ingredient
- Mix – 1 minute, speed 4
- Using a spatula, fold in the egg whites into the mixture
- Divide the batter between the two tins
- Bake until a skewer inserted comes out clean – 30-35 minutes, 175ºC
- Remove from the oven and let cool completely
- Making the cream cheese frosting:
- Clean the appliance bowl and fit the K-Beater
- Add the ingredients into the appliance bowl, fit the splashguard
- Mix and then scrape down the sides of the bowl with a spatula - 2 minutes, speed 3
- Add the next ingredient
- Mix – 2 minutes, speed 3
- Assembling the cake:
- Trim the cooled sponge with a cake leveller or a bread knife
- Place the bottom sponge layer on a cake board and spread with a layer of cream cheese frosting
- Top with the second sponge layer
- Spread a thin layer of cream cheese frosting around the top and sides to crumb coat the cake
- Chill in the fridge until set – 20-30 minutes
- Once set, cover the sides and the top of the cake with cream cheese frosting
- Transfer the remaining cream cheese frosting into a piping bag fitted with a large open star tip
- Pipe rosettes of frosting around the top of the cake
- Break up the excess cake trimmings into crumbs
- Hold the cake at an angle over a large bowl and press cake crumbs around the sides of the cake
- Sprinkle the remaining crumbs over the top of the cake
- Serve