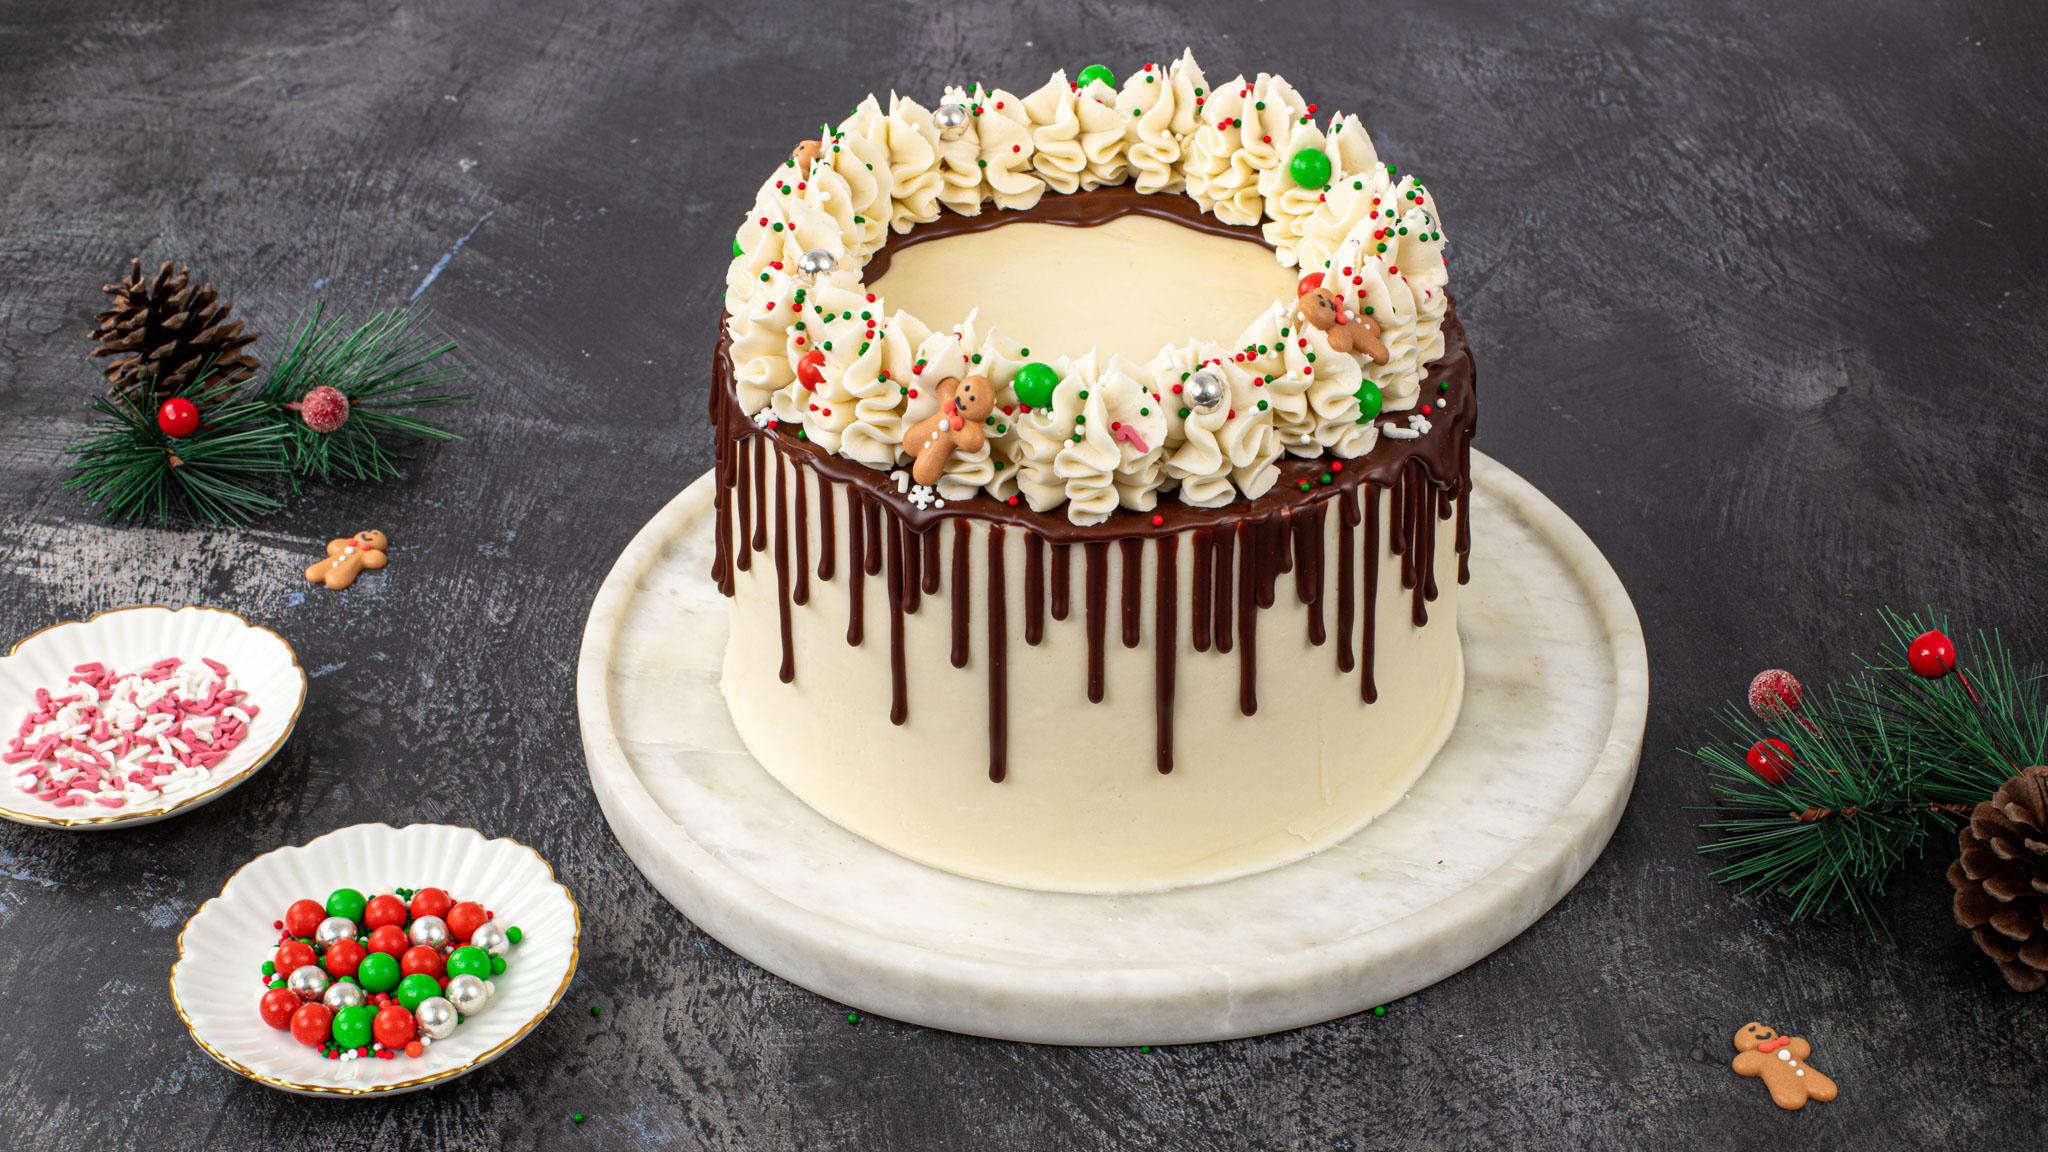
Christmas Ganache Drip Cake
For the full experience, make this recipe with the Kenwood Recipes app.

recipe by Kenwood https://kenwoodworld.com/
-

- Total Time
- 3hrs 0mins
-

- Serves
- 12
-

- Calories
- 1405

This delectable Christmas Ganache Drip Cake is the perfect dessert to celebrate the holiday season. The cake features moist and fluffy layers of vanilla sponge, sandwiched together with a luscious vanilla buttercream. The exterior is adorned with a rich chocolate ganache drip, adding a touch of elegance and decadence to the festive treat. With its festive colours and irresistible flavours, this Christmas cake is sure to become the centrepiece of any holiday gathering, spreading joy and delight to all who indulge in its delightful sweetness.
recipe updated 6 Feb. 2026
Ingredients
-
- Unsalted butter
- 1 kg
-
- Egg
- 8
-
- Caster sugar
- 400 g
-
- Vanilla extract
- 6 teaspoons
-
- Plain flour
- 400 g
-
- Baking powder
- 4 teaspoons
-
- Milk
- 10 tablespoons
-
- Icing sugar
- 1.2 kg
-
- Thickened cream
- 150 g
-
- Dark chocolate
- 100 g
-
- Sprinkles
- as needed


Tools
-
Oven
-
Cooking Chef XL
-
Piping bag
-
Round pan - 18cm (7")
-
Cake board - 20cm (8")
-
Cooling rack
Step preview
- Make the sponge
- Preheat the oven - 180°C
- Grease three rounds tins and line with parchment paper
- Fit the Creaming Beater
- Add the ingredients into the appliance bowl
- Mix – 2 minutes, speed 3
- While the machine is running, gradually add eggs, one at a time
- Mix and then scrape the bowl – 2 minutes, speed Min
- Add the next ingredient
- Mix – 30 seconds, speed Min
- Then add the following ingredients
- Mix – 1 minute, speed Min
- Then add milk
- Mix – 1 minute, speed Min
- Divide the mixture between the three round tins
- Bake until golden brown – 40 minutes, 180°C
- Remove from the oven and let cool in the tins – 10 minutes
- Remove from the tins and let cool completely on a wire rack
- Now, make the buttercream
- Clean the appliance bowl and fit the Creaming Beater
- Add the ingredient into the appliance bowl, fit the splashguard
- Mix – 2 minutes, speed 4
- Then add the following ingredients
- Mix – 2 minutes, speed 3
- Now, assemble the cake
- Trim the cooled sponge with a cake leveller or use a bread knife
- Place the bottom sponge layer on a cake board and spread with a layer of buttercream
- Top with another sponge and spread with buttercream
- Place the final sponge on top
- Spread a thin layer of buttercream around the top and sides to crumb coat the cake
- Chill in the fridge until set – 20-30 minutes
- One the cake has set, cover the sides and the top of the cake with some of the vanilla buttercream
- Chill in the fridge until set – 20-30 minutes
- Transfer the remaining to a piping bag fitted with a large open star tip and set aside
- Now, make the chocolate ganache
- Clean the appliance bowl and fit the Creaming Beater
- Add the ingredients into the appliance bowl, fit the splashguard
- Heat - 5 minutes, 45°C, speed Stir 1
- Transfer the chocolate mixture into a clean piping bag
- Place the chilled cake on a turntable
- Use scissors to cut the piping bag open by about 5mm
- Pipe the chocolate ganache along the top edge of the cake so that it drips down the side
- Create the drip effect around the top of the cake
- Chill in the fridge until set – 30 minutes
- Remove the cake from the fridge
- Pipe the remaining buttercream into swirls around the cake
- Decorate with festive sprinkles
- Serve